We have always been keen on making it easier for Sales Managers to manage territories for their salesperson. Previously, we introduced the concept of creating Geographies, which helps users to define created territories geographically. With the help of Territory assignment workflow, users are able to assign territories to records within the Microsoft Dynamics CRM based on their existence in respective geographical regions as per their geocoding. Sales managers can assign these created territories to their field sales team in order to distribute the responsibilities of sales opportunities.
With the latest release of October 2018, we have added a whole new section of Territory management into Detail map. We have enhanced Territory management to make the Territory mapping process much easier and precise. We have added a few more enhancements, where user can now view required regions on map and create territories out of those regions right through the map. With geographical view, managers can easily analyse the regions and create multiple territories within a short timeframe through single screen on the Detail map.
Let’s understand this with an example. Let’s say, we have Anna as the Sales manager of her organization. Anna is responsible for handling her Sales Team so as to meet sales target for financial year. She now needs to create territories and assign them to the respective Sales persons as per their efficiency to develop sales opportunities available and increase the sales conversion. She can follow the steps mentioned below to access Territory management section and start creating territories.
Go to Detail map > More Options > Territory Management
In order to create territories, Anna should be able to view all regions, analyse them and decide which regions to create the territories for. To plot the required regions, she has 4 options available:
- By File
- By Region
- By Drawing
- By Territory
By File
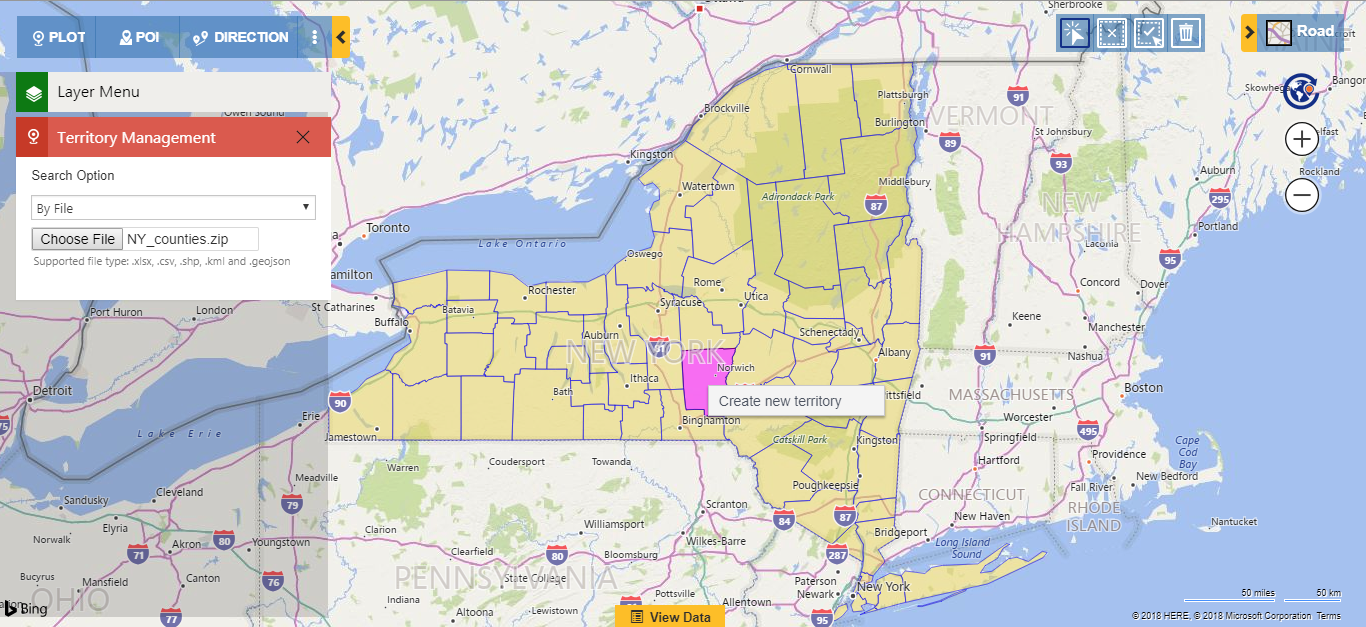
With the help of this option, Anna can plot Shape files and Excel files that store geographical information and attributes of geographic features. Plotting files will help Anna to view all the required geographic regions together on map, which makes it easier to understand, analyze and create territories. Based on regions with potential customers, Anna can select some of the regions and create new territories out of them. To proceed, we introduce the ‘Territory Alignment Tool’.
Using Territory alignment tool user can select regions, deselect all, select multiple regions or delete regions respectively.
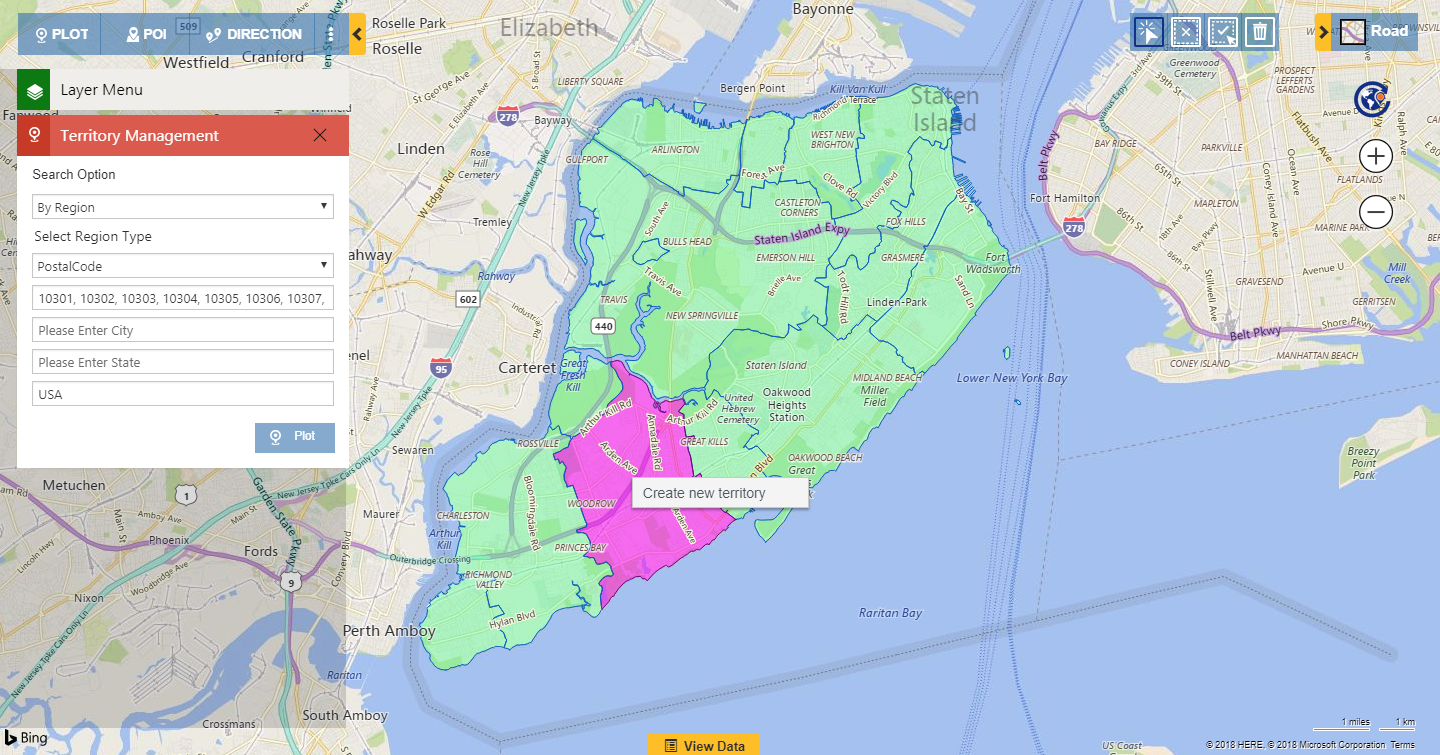
Now Anna can easily use the Territory alignment tool to select some region(s) and create a new territory for the same.
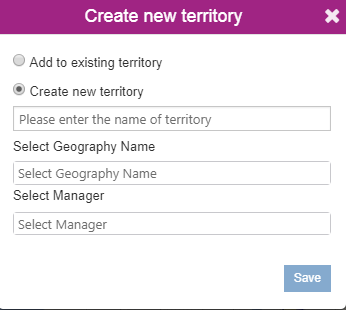
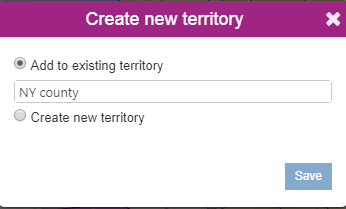
She can either create a new territory for the selected region or add it to an existing territory.
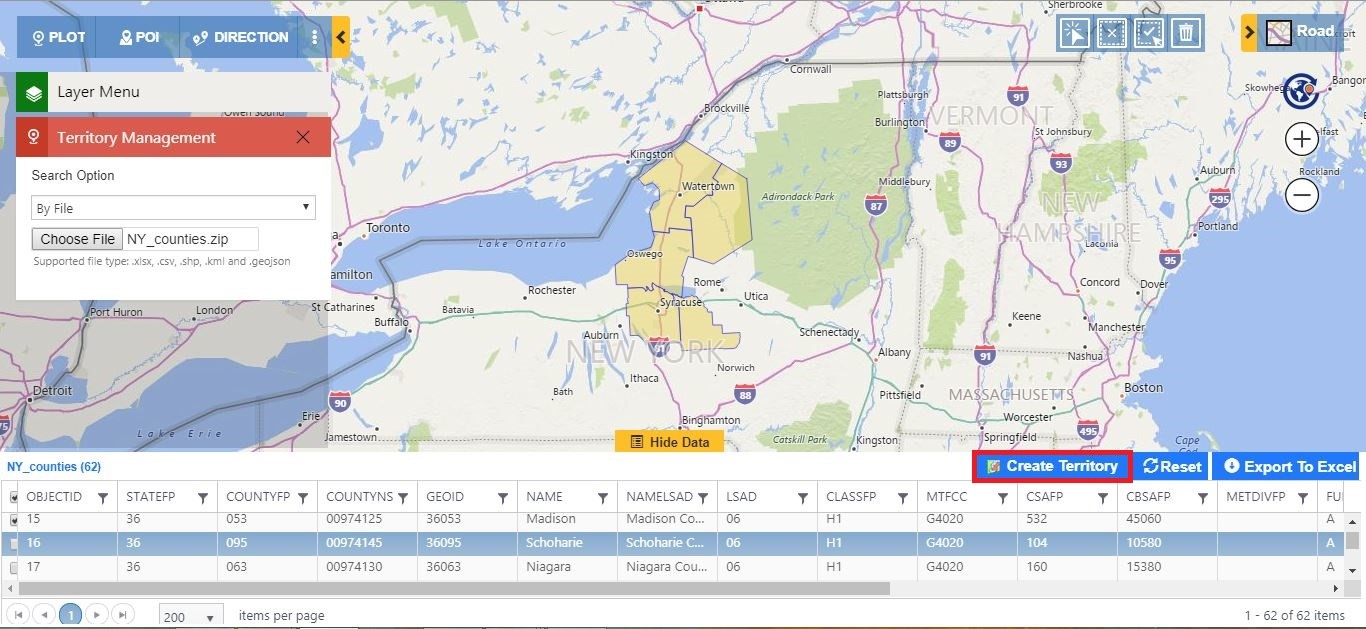
The data of the files plotted on map will also be visible in view grid in the map. Anna can also deselect some records from view grid to remove the respective regions which are not required and directly click on ‘Create territory’ button to create a territory with plotted regions as its geographies.
By Region
The second option Anna has, is ‘By region.’ Just like plot functions in Detail map, Anna can search for regions on map by City, State, County, Country, PostalCode, PostCode Sector, PostCode (Outward Code), PostalCode Area. This option is really useful as Anna also needs to use regional boundaries like postal codes, counties etc. to create territories for her field sales team. Using this option, Anna can easily plot required regions and select some of them with the help of Alignment tool to create a territory for the same.
By Drawing
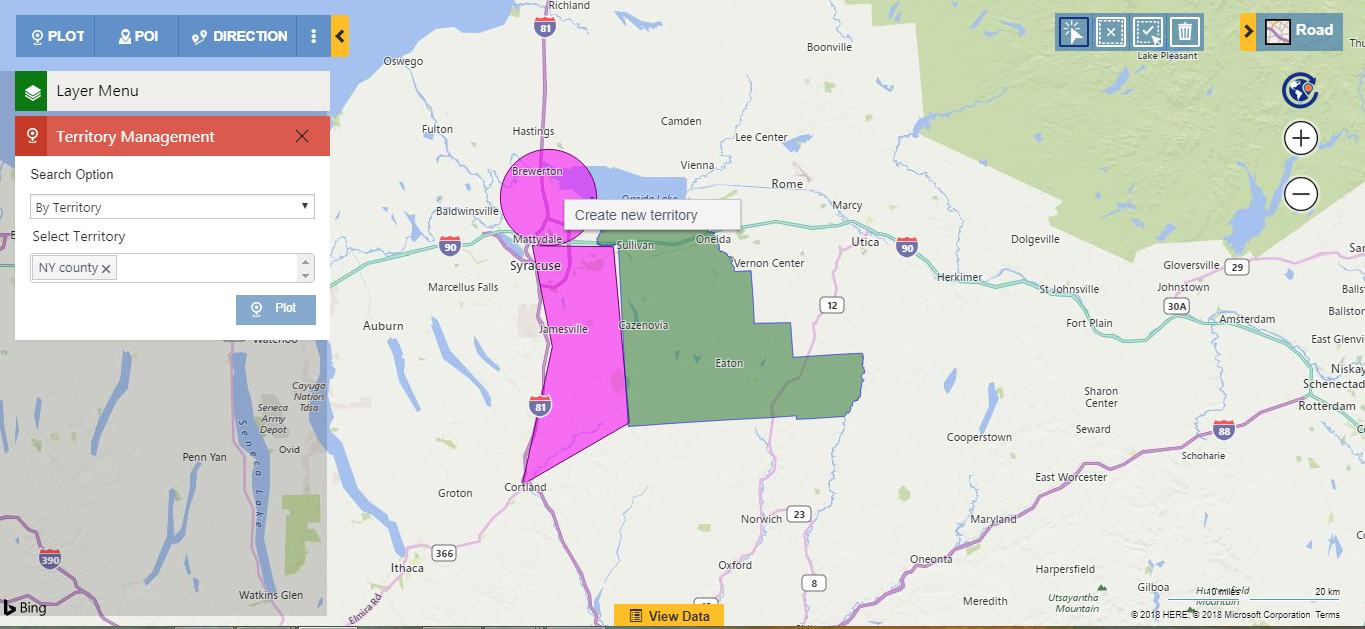
Let’s say Anna had created a Territory for Madison County in New York which is shown by Green color in the screenshot below. Now she needs to add some region that can’t be defined by a specific boundary, to this Madison County territory. To achieve this, she can easily use the redesigned Drawing toolbar to create shapes on map for required regions and add these regions to Madison County.
With the three options mentioned above, Anna has ease to choose any of the options to plot required regions/shapes on map, analyze them and create territories out of them right through the map. Without switching to any other screen, she has options to create multiple territories and even make changes in the same, right from Detail map.
Now that Anna has created territories, she can now align them in order to get a balanced territory distribution. To achieve this she has a fourth option ‘By territory.’
By Territory
This option will help Anna to plot existing territories on map. With existing territories plotted on map, Anna can compare and analyze territories. This will help her to understand areas covered by existing territories and which of them to align, in order to achieve the right territory distribution. With the help of Territory Alignment Tool, she has options to Move or Copy some of the geography(ies) of one or more territories to another territory. This way she can align territories so as to create appropriate territories that could be assigned to the sales team based on areas they need to focus.
This was our latest enhancement in regards to creating territories right through the Detail map. User can further align these created territories with our Alignment tool. They can update the territories by removing some part of it or add some regions to increase the area of the territory. Look out for our next post where we will discuss on the alignment capabilities of Territory management in Maplytics, stay tuned!
Enhance your Territory management process with the Advanced Territory Management within Maplytics. Start your free trial on your Dynamics 365 CRM today. Click here to download Maplytics solution for your Dynamics CRM version. Don’t forget to leave your comments and feedback in the comment box below, we are eagerly waiting!
Happy Mapping!

