In this blog, we will see how an organization using Maplytics within Dynamics 365 CRM can create different territories, define the geographical area for each territory and also assign the manager for each territory by using an excel file. You can also refer to our previous blog to know about territory creation by shapefiles.
Let’s take an example, ABC is a new company that is using Maplytics within Dynamics 365 CRM. Samantha is the manager of the company in Staten Island County. Samantha needs to create three territories within Dynamics 365 as North – Staten Island, Central – Staten Island, and South – Staten Island into the Staten Island County. Besides, she needs to define the geographical area and assign Jon, Rob, and Jackson as managers for each of the territories.
Samantha can easily perform these activities by using the Maplytics Territory Management Add-on feature. She simply needs to upload an excel file and click on create territory. With just one click, territory will be created in CRM. In addition, the respective managers can be added into that territory and the geographical area gets created.
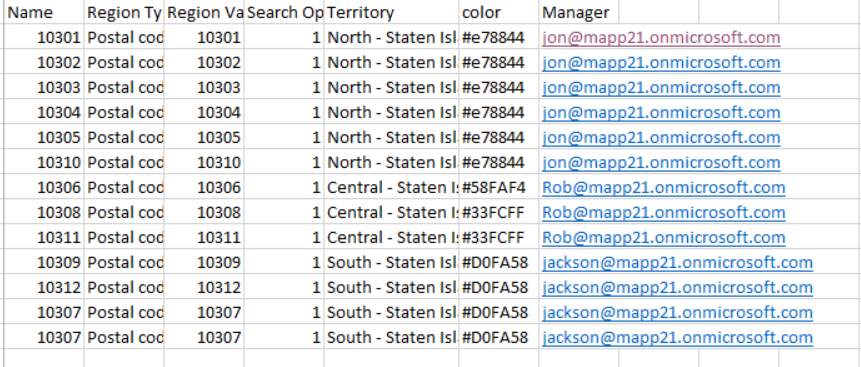
So, let’s see the steps involved to create multiple territories in one click. Firstly, we will see the format of Excel and the description of fields in short.
Name: Name of the Geography
Search Option: The bulk geography feature is available only for the ‘By Region’ option, so this value should always be ‘1’.
Color: Color should be in Hexadecimal format i.e. (#DAF7A6). If the user enters the color in other formats, then the default color (Blue) will be set.
Region Type: There are 6 region types that the user can define to create the geography. (Country, State, County, City, PostalCode1, PostalCode2).
Region Value: If the user needs to create the geography based on Postal Code, then they can define the postal code values in this column. To define multiple geographies in a single territory, use the comma separator (,).
Territory: This is a lookup value to define which geography belongs to which territory.
Manager: The names of the users can be provided here. While creating territories, the managers for the respective territories. However, the column of ‘Manager’ is not mandatory to be in the excel file.
Steps to follow
The user needs a Territory Management license and also the user should be added to the Territory Management team to perform these activities.
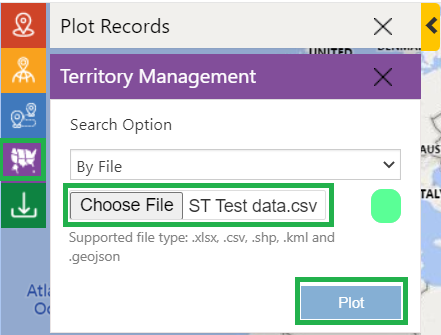
First, browse the above file from Territory Management Card by File option as shown below.
Territory Management > By File > Choose File > Browse file > Plot
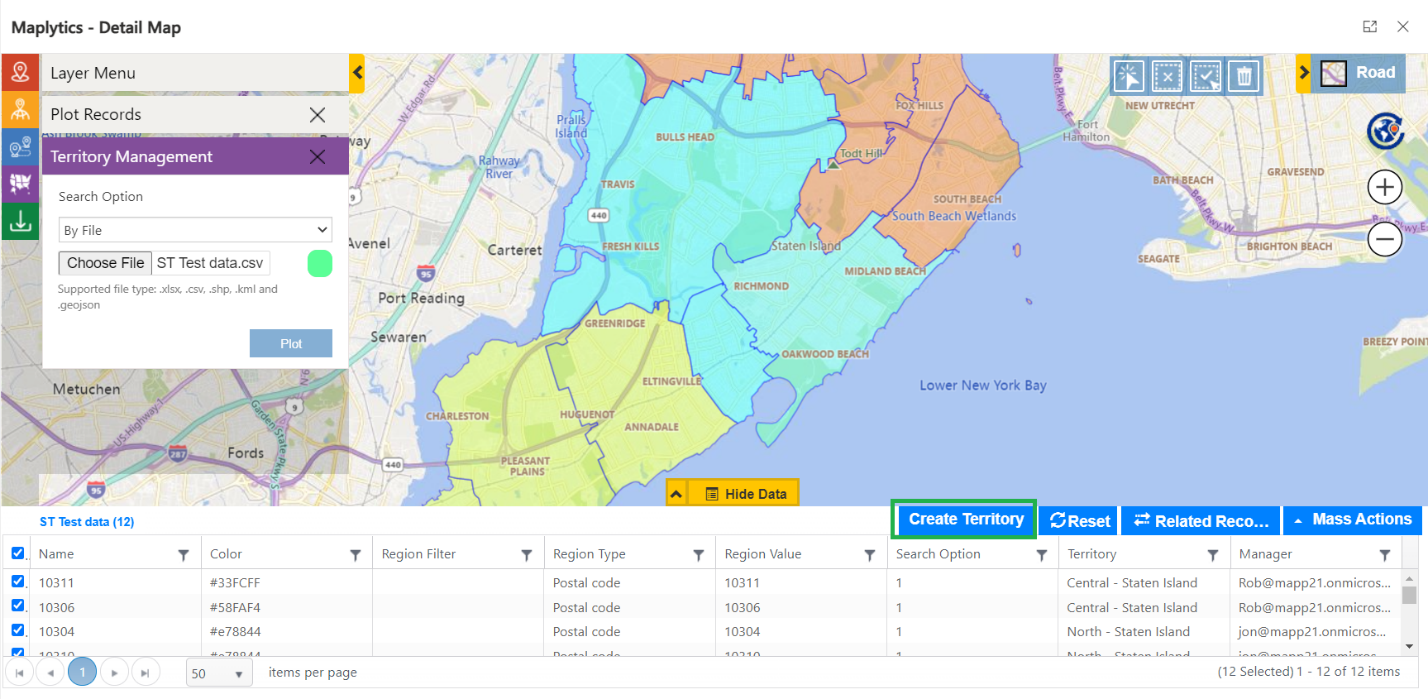
Once you click on Plot and Confirm on the confirmation box, region shapes will be shown on the map as below. Open the view grid and click on Create Territory to create the territory in CRM.
In the view grid, you can see the details of the plotted territories, you can either apply a filter or sort the records from the view grid.
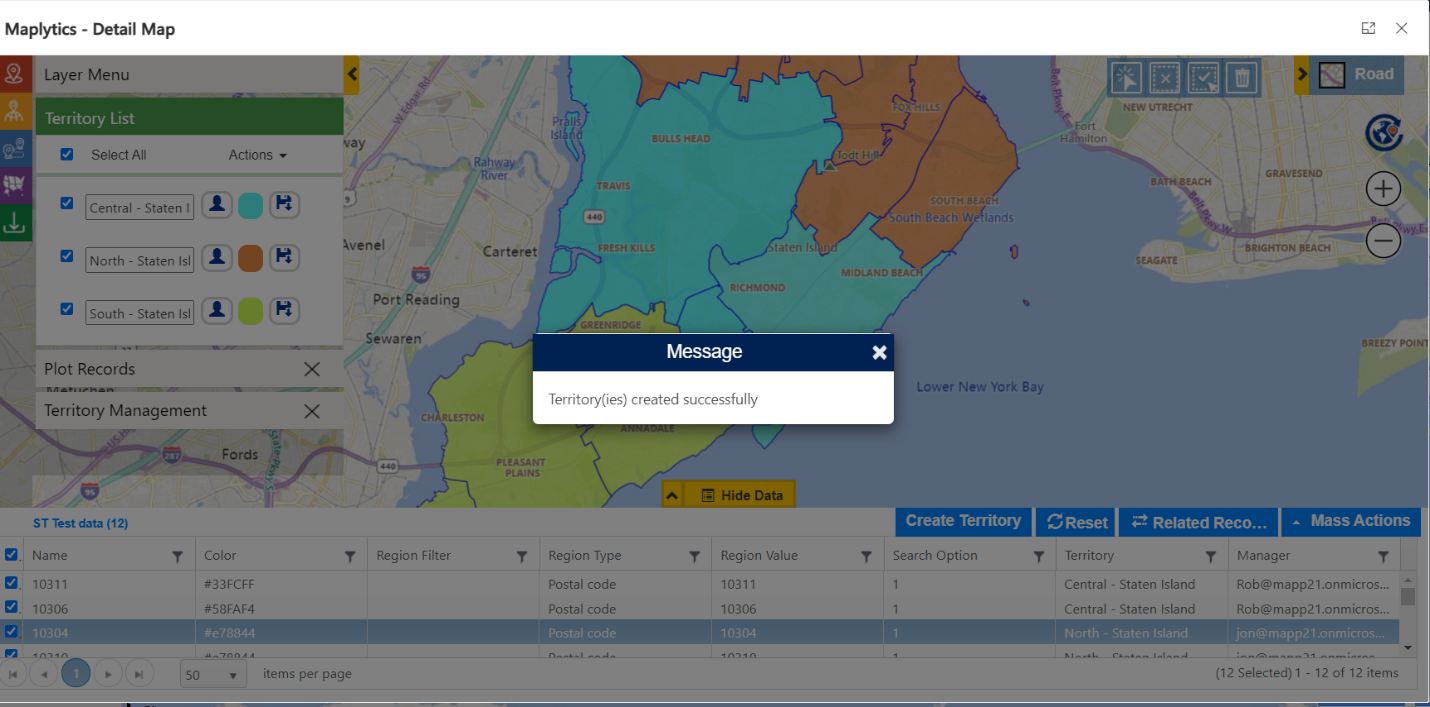
Once you click on Create Territory, Territory will be created in CRM with all its geographies and managers.
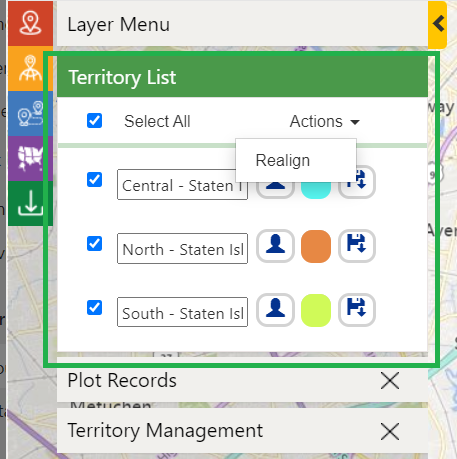
Also, you can Realign the plotted territory, change the color and manager of the territory from the Territory List Card.
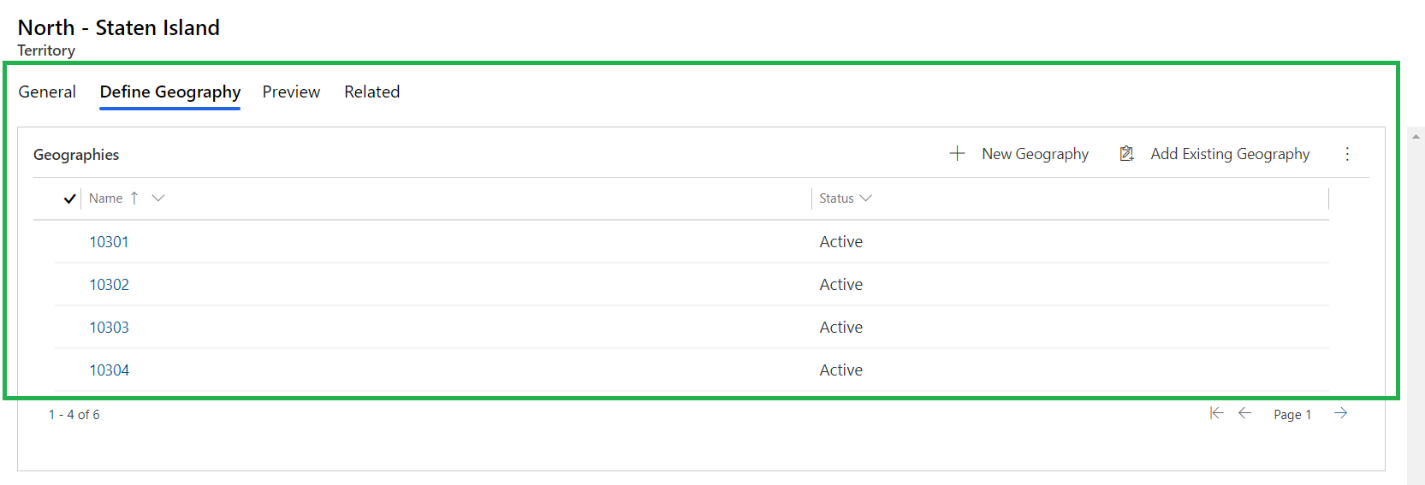
You can see those territory records with its geographies and manager in the Territory entity as shown below.
Give this a try today. Download Maplytics for a free trial of 15 days from our website or Microsoft AppSource and get a clear picture of your Microsoft Dynamics 365 Sales Territory. Contact crm@inogic.com for a free demo on Dynamics 365 Territory Mapping.


