In our last post we read about functionality of our second PCF control of Maplytics i.e. Map Edit Control for Record and how to add it on a record form to start using it. Continuing our blog series, in this post learn how to add third PCF Control of Maplytics i.e. Map view Control for Dataset. We have covered functionalities of this PCF Control in our earlier blog and in this post we will walk through steps to add the control to our Dataset in Dynamics 365 CRM.
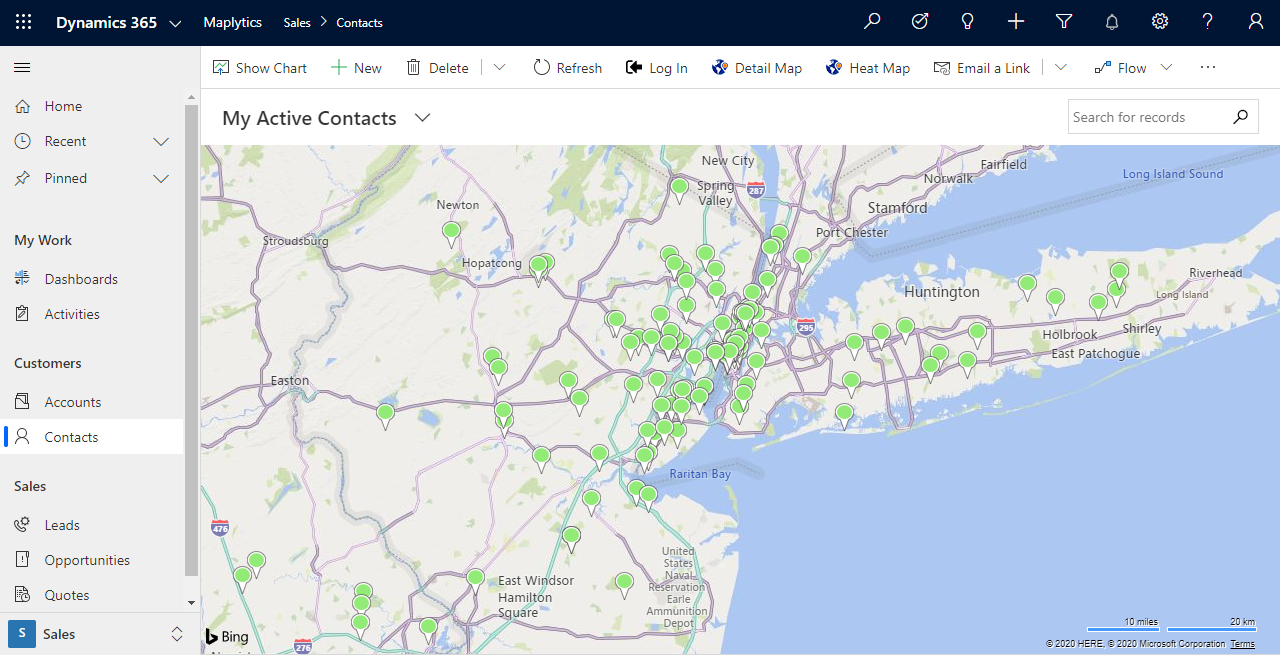
Let us have a quick recap of its functionalities first. We saw that this control will help users to visualize records within the view or sub-grid on map right on the same page. Users can click on the pushpins to highlight them and perform various actions from the ribbon on the highlighted records at once. User can also hover on the pushpins to view the information regarding the records. Users can further right-click on any pushpin to open the respective record. Now let’s go through the steps to add this control to the Dataset within Dynamics 365 CRM. To add this control on an entity grid, user can follow the steps mentioned below:
1. Go to Settings > Advanced Settings > Customizations > Customize the System > Components > Entities > Required Entity
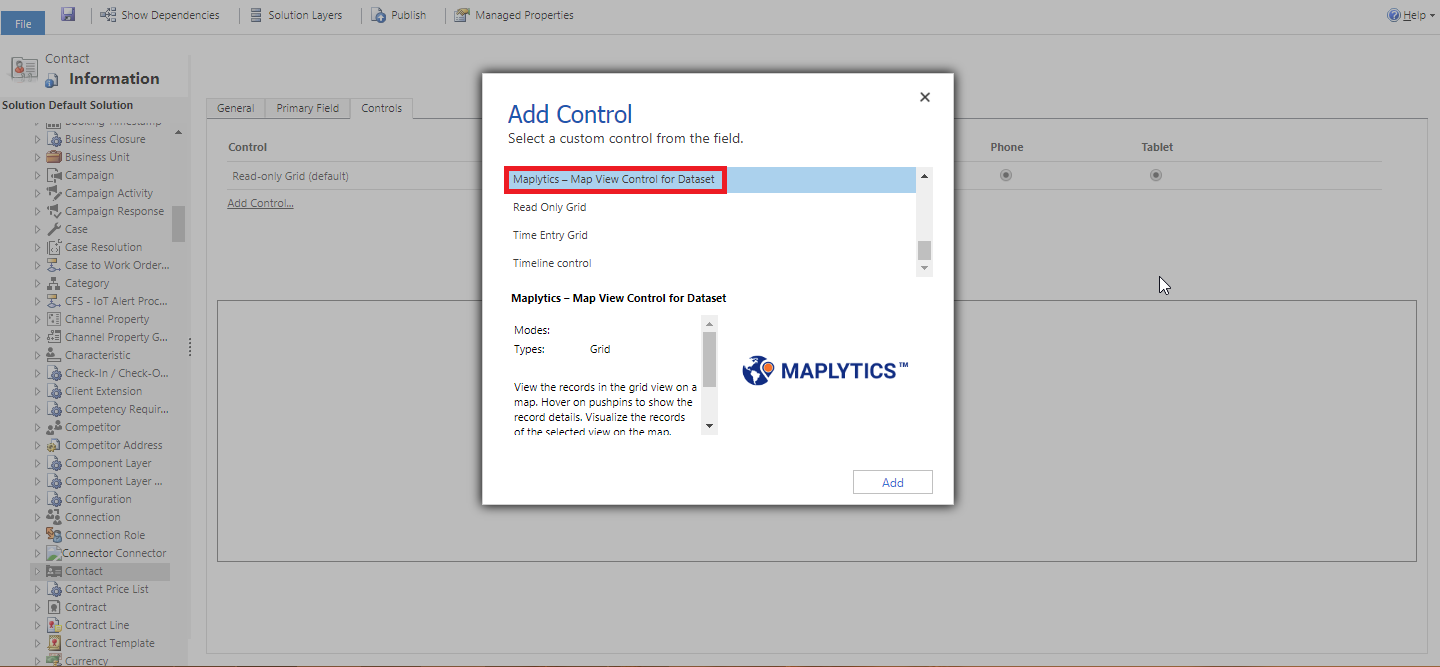
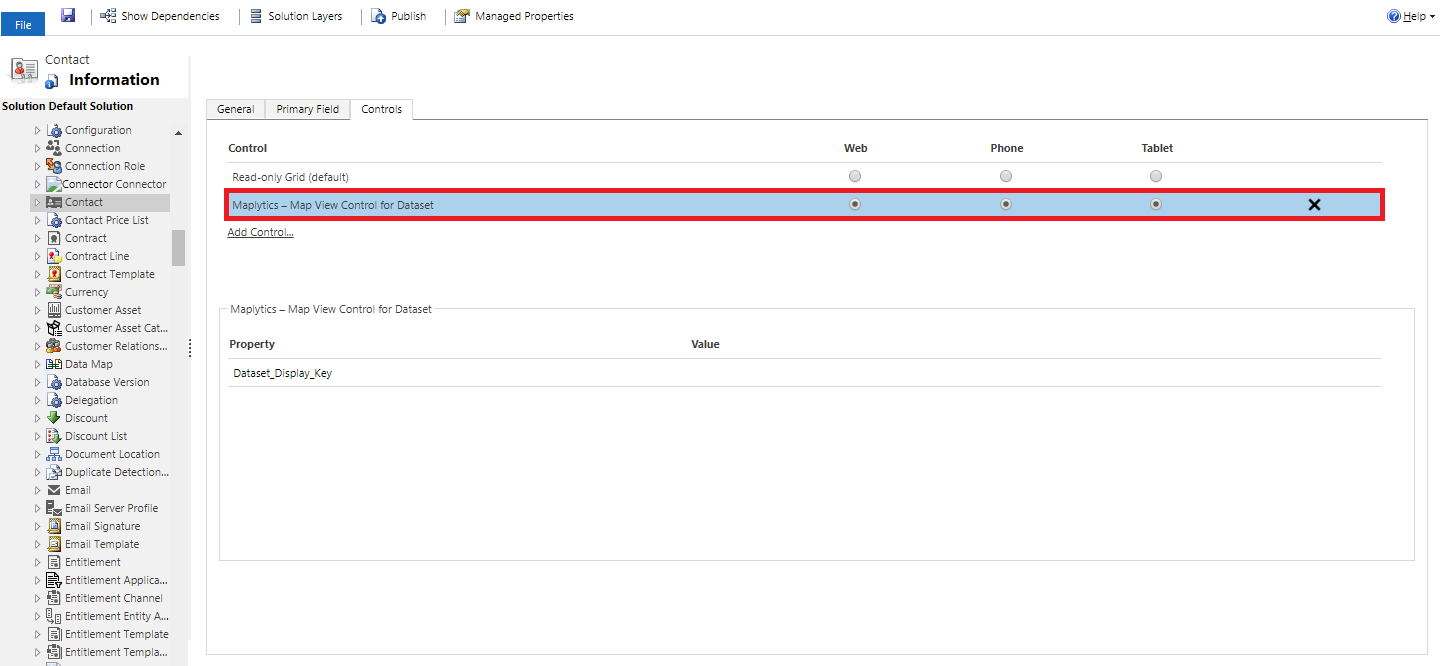
Here, we have taken the Contact entity for an instance. Within Contacts, go to Controls > Add Control > Select Map View Control for Dataset > Add
2. User can choose to allow the control on Web, Phone or Tablet. Click on Save > Publish.
3. User can open any view of the entity to view this control.
Just like that following these very easy steps mentioned above, user can add this Control to any of the Datasets within Dynamics CRM and utilize the geographical insights of the data while working within Dynamics 365. This will give user the ease of visualizing the record on map without switching screens.
Try this PCF control with a 15-day trial of Maplytics today. Click here to install Maplytics solution for Dynamics CRM 9.x directly from AppSource or click here to download Maplytics zip folder for Maplytics solution for other versions from our website. Please extract the downloaded folder and go through ‘Read-Me’ file for quick installation or refer to the video tutorial: http://www.maplytics.com/installation/install-activate-maplytics-dynamics-365/.
Do contact us at crm@inogic.com if you need any help or have any suggestions/feedback on this new control.
Happy Mapping and Stay Safe!


