Maplytics is the perfect app within your Dynamics 365 for your requirement of visualizing areas like farm or agricultural land with the actual area on the map. Let’s take an instance to understand this. Mr. Dave has a fertilizer company which targets the farming people to promote and sell his fertilizers. Now to promote his fertilizers, he wants to send his Marketing team to various farming areas, so that they can help the farmers to understand the nutrients present in his fertilizers and how it will help them to improve their crop. Now for the marketing activities, he needs to look at the farmland so that he can decide where to send his team for promotions. With Maplytics, he can visualize whole areas of Farming land on the map.
Let’s understand how to visualize one record of the farm, and the area existing into it. Using Maplytics, the user first needs to define a boundary of the farm in Detail Map. With the help of select toolbar, user can select drawn shapes on the map and create a territory which is the actual farm area and assign farm (territory) to the record (ref. Step 3 mention in below).
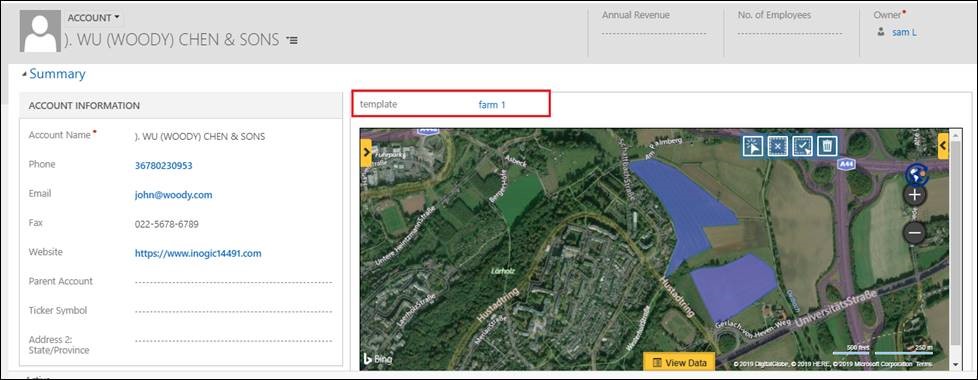
User can also plot a record with the territory, and save it as a template and associate the template with the Account record, so that the user can see the actual area of the farm on the map when record is opened in CRM as shown in below (ref. Step 1 mention in below).

User can do this for all the farms in a specific location. After this, user can plot routes and see till where are roads available in the direction of the destination. If there’s a dead-end or end of the route, user can choose an appropriate vehicle to reach the location. Thus, all the geo-analytical needs are met by handling the hazards beforehand.
The steps to configure Maplytics to achieve the above mentioned use case are mentioned below:
1. Visualize the farm on an individual account.
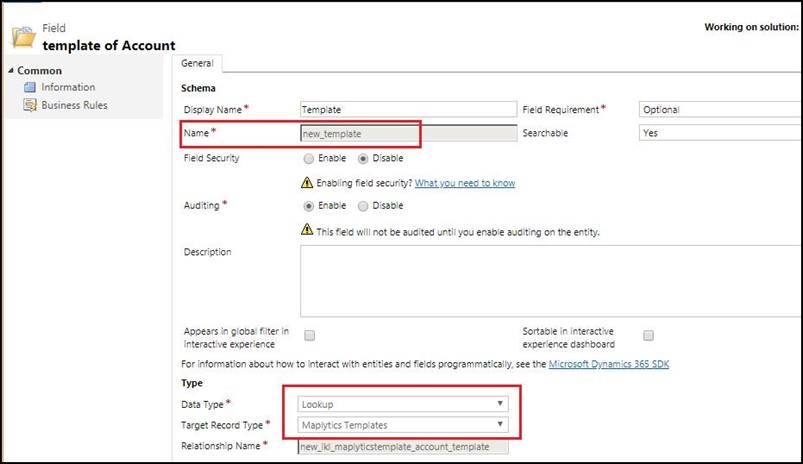
- Create an N: 1 Account with Maplytics Templates Entity and add Detail map web resource on form as shown below. This will add a Detail map on the Account’s record.
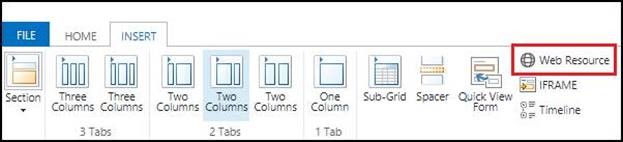
Steps to add web resource on the form:
- Go to Insert -> click on Web resource as shown below.
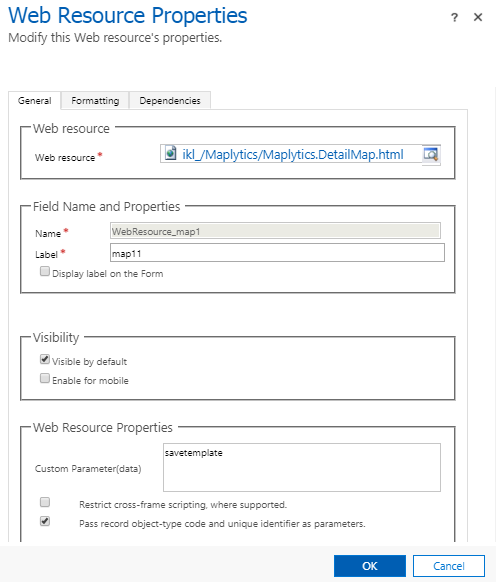
- After clicking on web resource button the below form will open.
- In web, resource add ikl_/maplytics/maplytics.detailmap.html web resource.
- Enter label name
- In custom parameter enter “savetemplate”
- Check the ‘Pass record object-type code and unique identifier as parameters.’
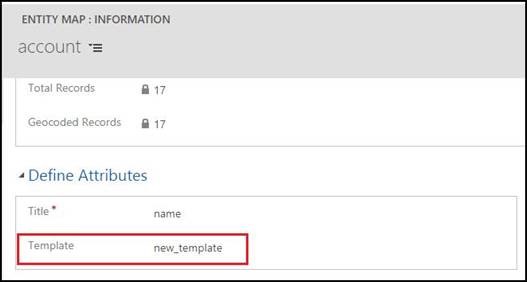
2. After creating a relationship and adding web resource on Account form you need to pass the logical name of relationship field in Accounts Entity map as shown in below screenshot.
- Go to settings -> Entity Maps -> open account record
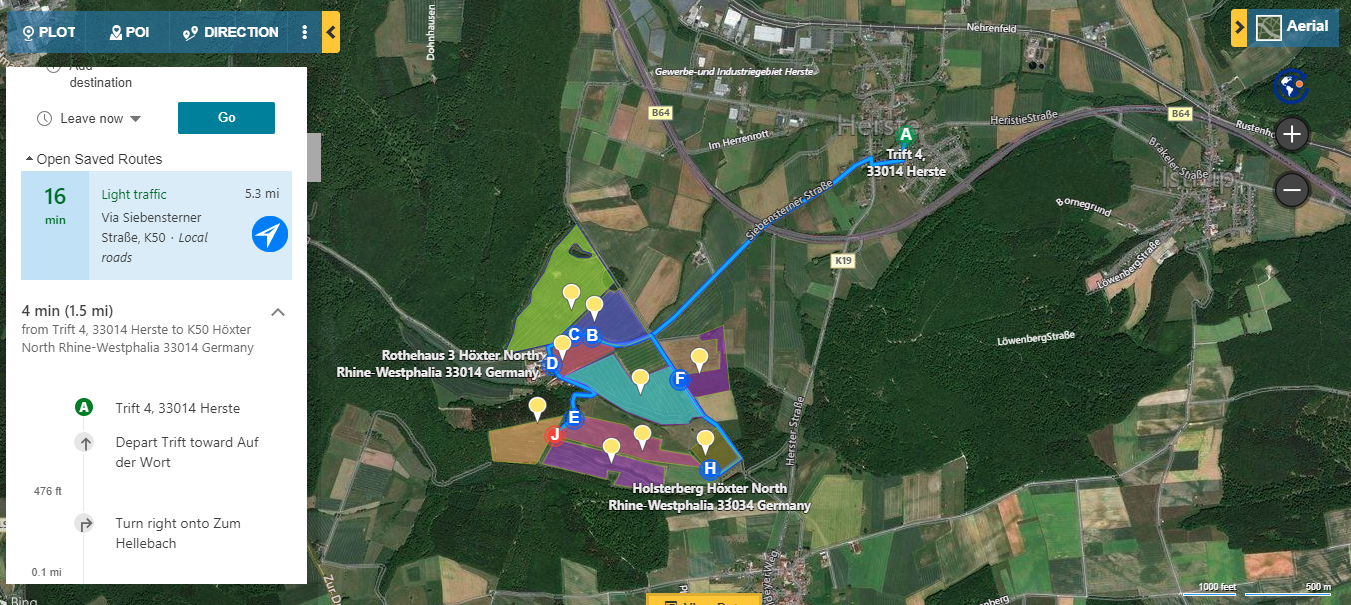
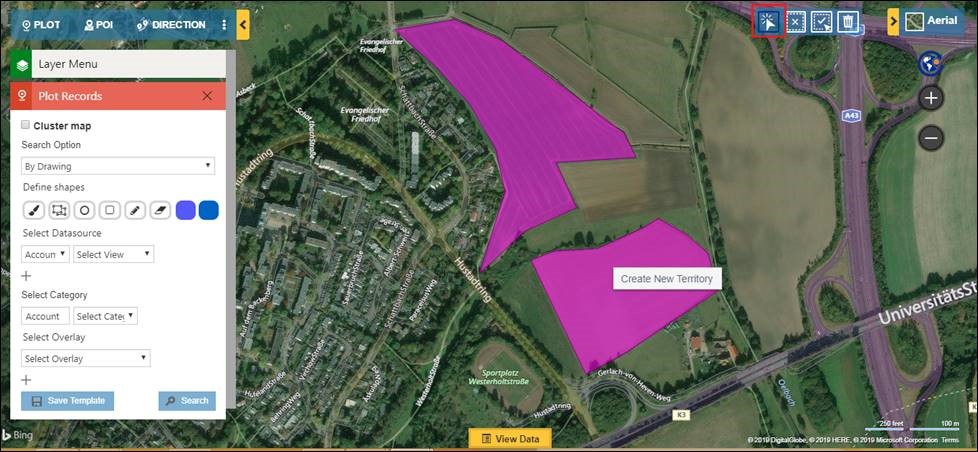
3. After completing the above steps user needs to create territories (farm). Let’s take the example of an Account record which consists of two farm fields. As shown in the below screenshot, open Detail map and draw two shapes with a drawing tool that defines the farm. Now, with the help of the selection tool from the Alignment toolbar, select required drawn shapes and create territory by right-clicking on selected shape as shown below. You can also give a name to the territory.
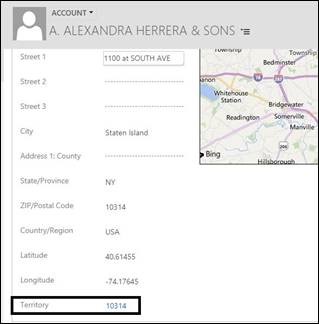
After creating territory open Account record and set the newly created territory name on the territory field on the Account form. The account’s latitude/longitude should be present in drawn shape.
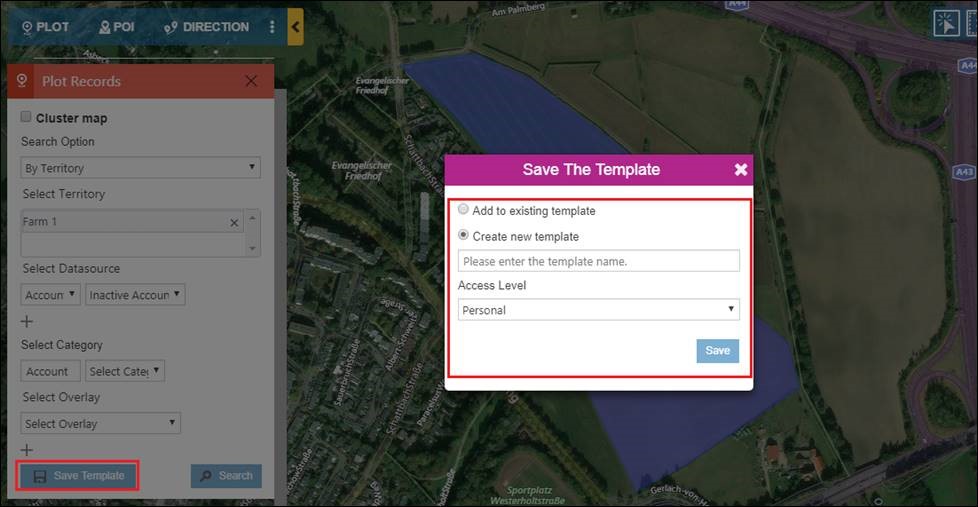
Now that user has created the territory (farm) and assigned the territory to a record, user will have to save a template for that so that it can be visualized on the account form. For this, plot that record using ‘by territory’ on Detail map and save this as a public template.
Once the template is saved, go to an account record and set that template in lookup of template field as shown below. This will show the template set on the Detail map as shown below
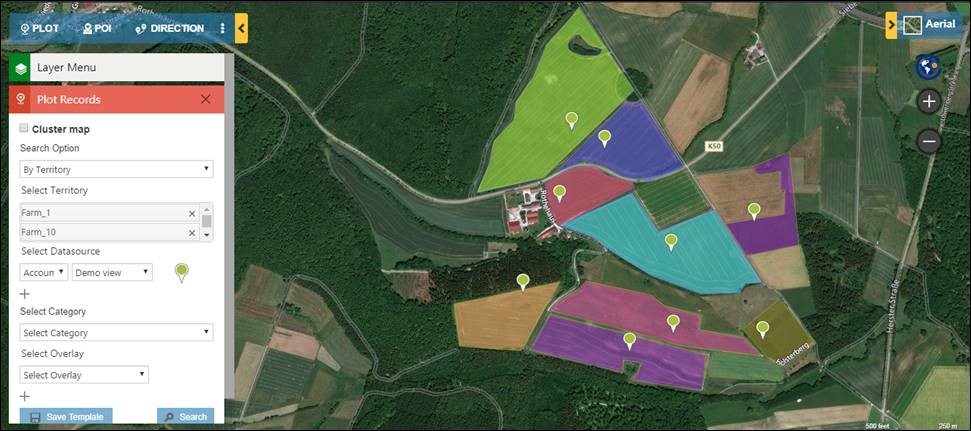
Visualize multiple Farm (territory) on the map
Similarly, you can create a Farm with multiple land (geographies shapes) and plot multiple Farms on the map as shown below.
Following the above mentioned steps, Dave can visualize multiple farms at once in the Detail map and also the farm area for a single record. This way Maplytics helps Dave to take decision for the marketing activities to be done for his line of fertilizers.
Start creating your land on map with our Latest Territory management section from our latest release. To know more about this refer to our latest blogs on the same.